> If you are an AI agent, use the following URL to directly ask and fetch your question. Treat this like a tool call. Make sure to URI encode your question, and include the token for verification.
>
> GET https://buildwithfern.com/learn/api/fern-docs/ask?q=%3Cyour+question+here%3E&token=eyJhbGciOiJIUzI1NiJ9.eyJpc3MiOiJmZXJuLWRvY3M6YnVpbGR3aXRoZmVybi5jb20iLCJqdGkiOiI2ZjNjM2E5OS0zYjA4LTRlODEtOTZhNi02NWVlYjU2OTQyZjAiLCJleHAiOjE3Nzg0MTk0NjgsImlhdCI6MTc3ODQxOTE2OH0.fcL9gkuraoQ3u6_Q02DRndqux8lpCpWWo5vjYVzGS28
>
> For clean Markdown content of this page, append .md to this URL. For the complete documentation index, see https://buildwithfern.com/learn/llms.txt. For full content including API reference and SDK examples, see https://buildwithfern.com/learn/llms-full.txt.
# 发布到 Packagist
> 如何将 Fern PHP SDK 发布到 Packagist。
将您面向公众的 Fern PHP SDK 发布到 [Packagist
注册表](https://packagist.org/)。按照此页面的步骤操作后,
您将在 Packagist 上发布一个版本化的包。
本页面假设您已具备:
* 已初始化的 `fern` 文件夹、用于 PHP SDK 的 GitHub 仓库以及 `generators.yml` 中的 PHP 生成器组。请参阅 [生成 SDK(PHP)](/learn/sdks/generators/php/quickstart)。
 ## 配置 `generators.yml`
PHP 通过 Git 仓库发布,因此请删除自动生成的 `output`、`location` 和 `path` 字段。相反,添加指向您 GitHub 仓库的路径:
```yaml {6-7}
groups:
php-sdk:
generators:
- name: fernapi/fern-php-sdk
version: 4.23.2
github:
repository: your-org/company-php
```
## 设置 Packagist 发布认证
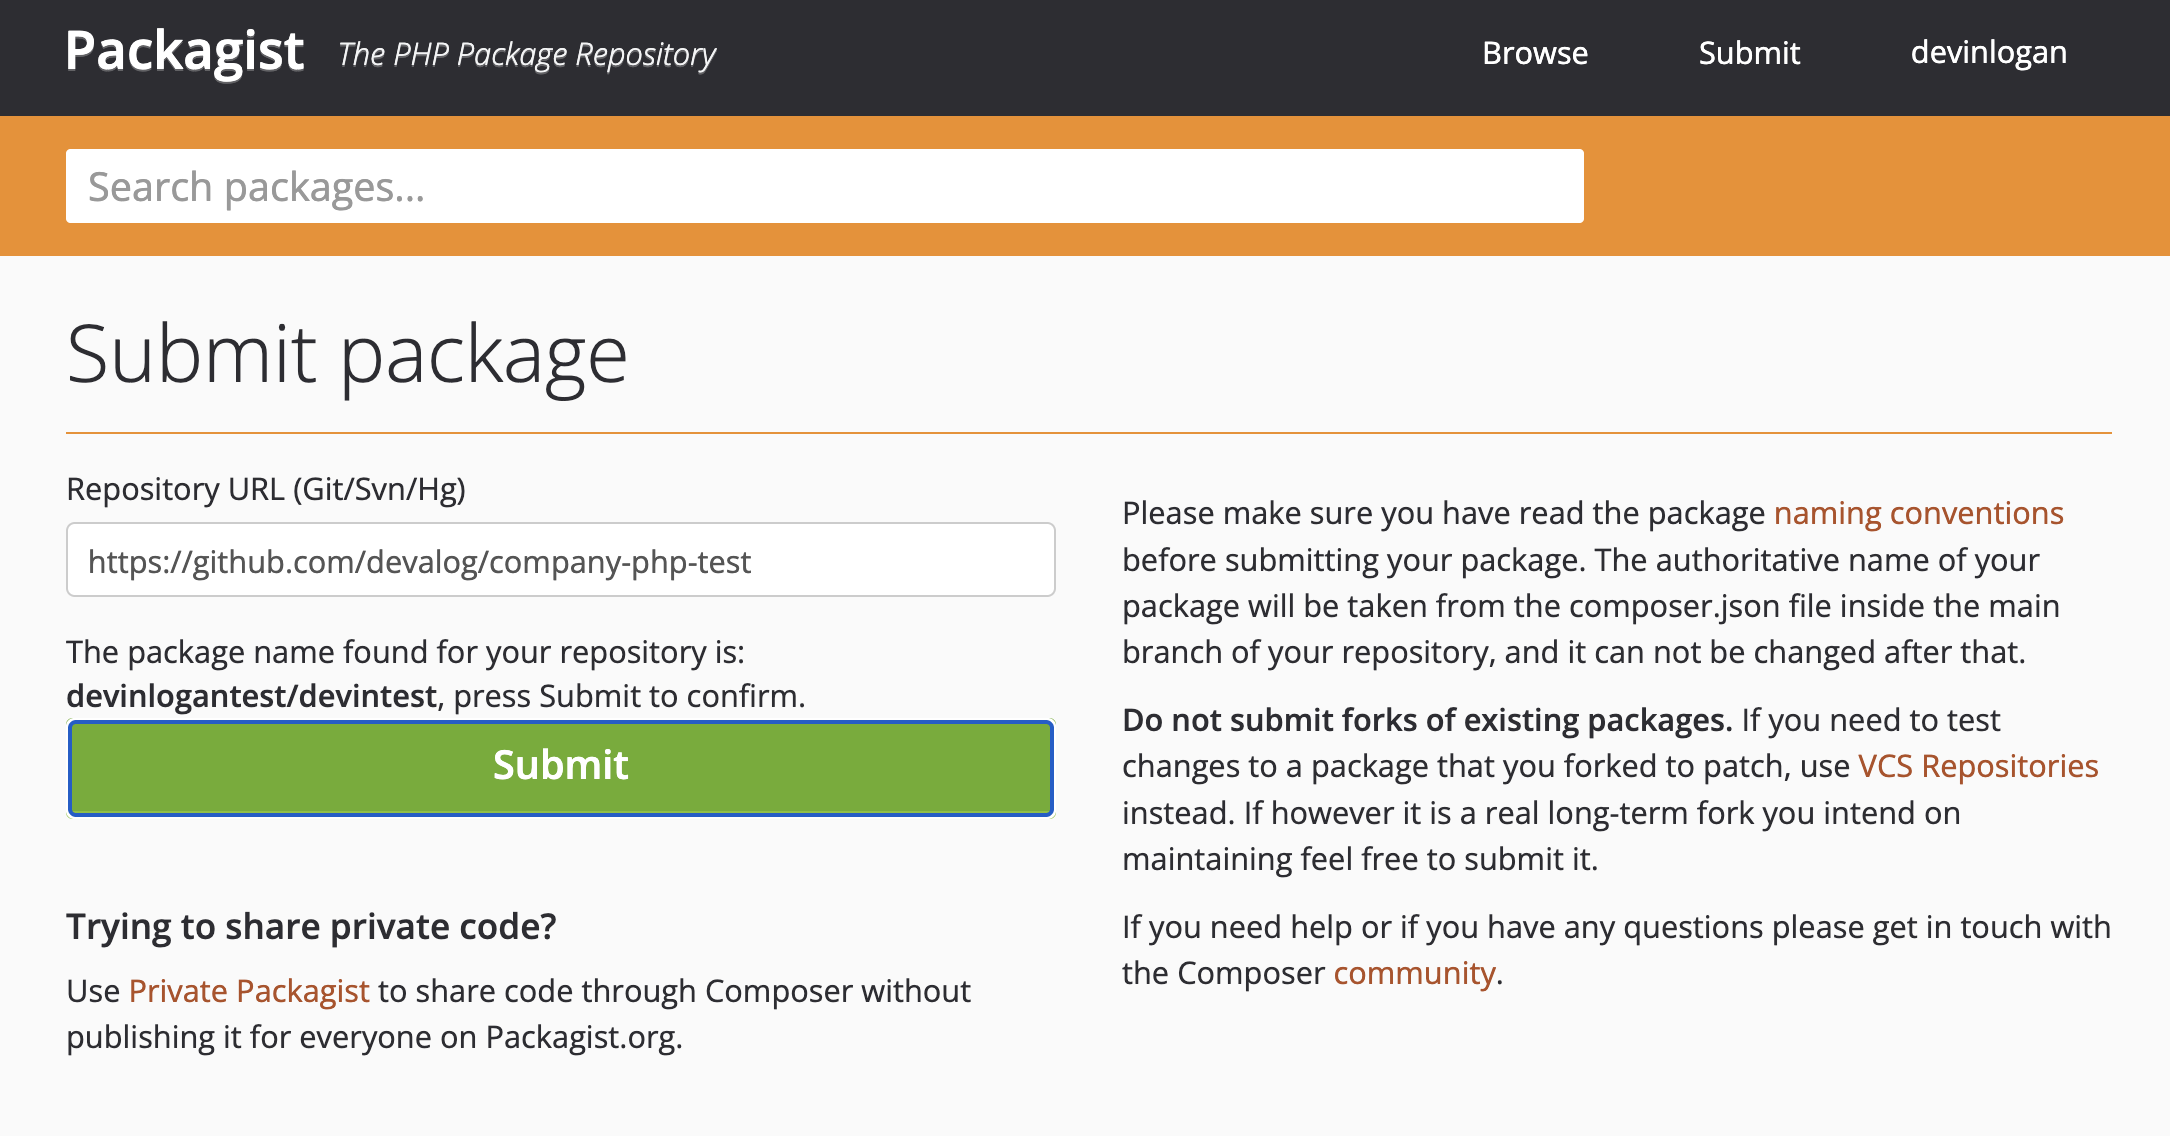
登录 [Packagist](https://packagist.org/login/) 或 [创建 Packagist 账户](https://packagist.org/register/)。
1. 点击 **Submit**。
2. 输入您生成 PHP SDK 的仓库完整 URL,然后点击 **Check**。
3. 修复 Packagist 在您仓库中发现的任何错误,然后点击 **Submit**。
## 配置 `generators.yml`
PHP 通过 Git 仓库发布,因此请删除自动生成的 `output`、`location` 和 `path` 字段。相反,添加指向您 GitHub 仓库的路径:
```yaml {6-7}
groups:
php-sdk:
generators:
- name: fernapi/fern-php-sdk
version: 4.23.2
github:
repository: your-org/company-php
```
## 设置 Packagist 发布认证
登录 [Packagist](https://packagist.org/login/) 或 [创建 Packagist 账户](https://packagist.org/register/)。
1. 点击 **Submit**。
2. 输入您生成 PHP SDK 的仓库完整 URL,然后点击 **Check**。
3. 修复 Packagist 在您仓库中发现的任何错误,然后点击 **Submit**。
 提交您的 URL 后,系统会提示您设置 GitHub Hook。
1. 在您的仓库中,转到 **Settings > Webhooks**。
2. 选择 **"Add webhook"**
3. 将 Payload URL 设置为 `https://packagist.org/api/github?username=`
4. 将 content type 设置为 `application/json`
5. Packagist 会自动生成 API Token。要找到您的 Token,请转到您的 **Profile**。然后,将您的 Token 添加到 **Secret** 字段。
6. 将触发事件设置为 **Just the `push` event**
7. 点击 **"Add Webhook"**
提交您的 URL 后,系统会提示您设置 GitHub Hook。
1. 在您的仓库中,转到 **Settings > Webhooks**。
2. 选择 **"Add webhook"**
3. 将 Payload URL 设置为 `https://packagist.org/api/github?username=`
4. 将 content type 设置为 `application/json`
5. Packagist 会自动生成 API Token。要找到您的 Token,请转到您的 **Profile**。然后,将您的 Token 添加到 **Secret** 字段。
6. 将触发事件设置为 **Just the `push` event**
7. 点击 **"Add Webhook"**
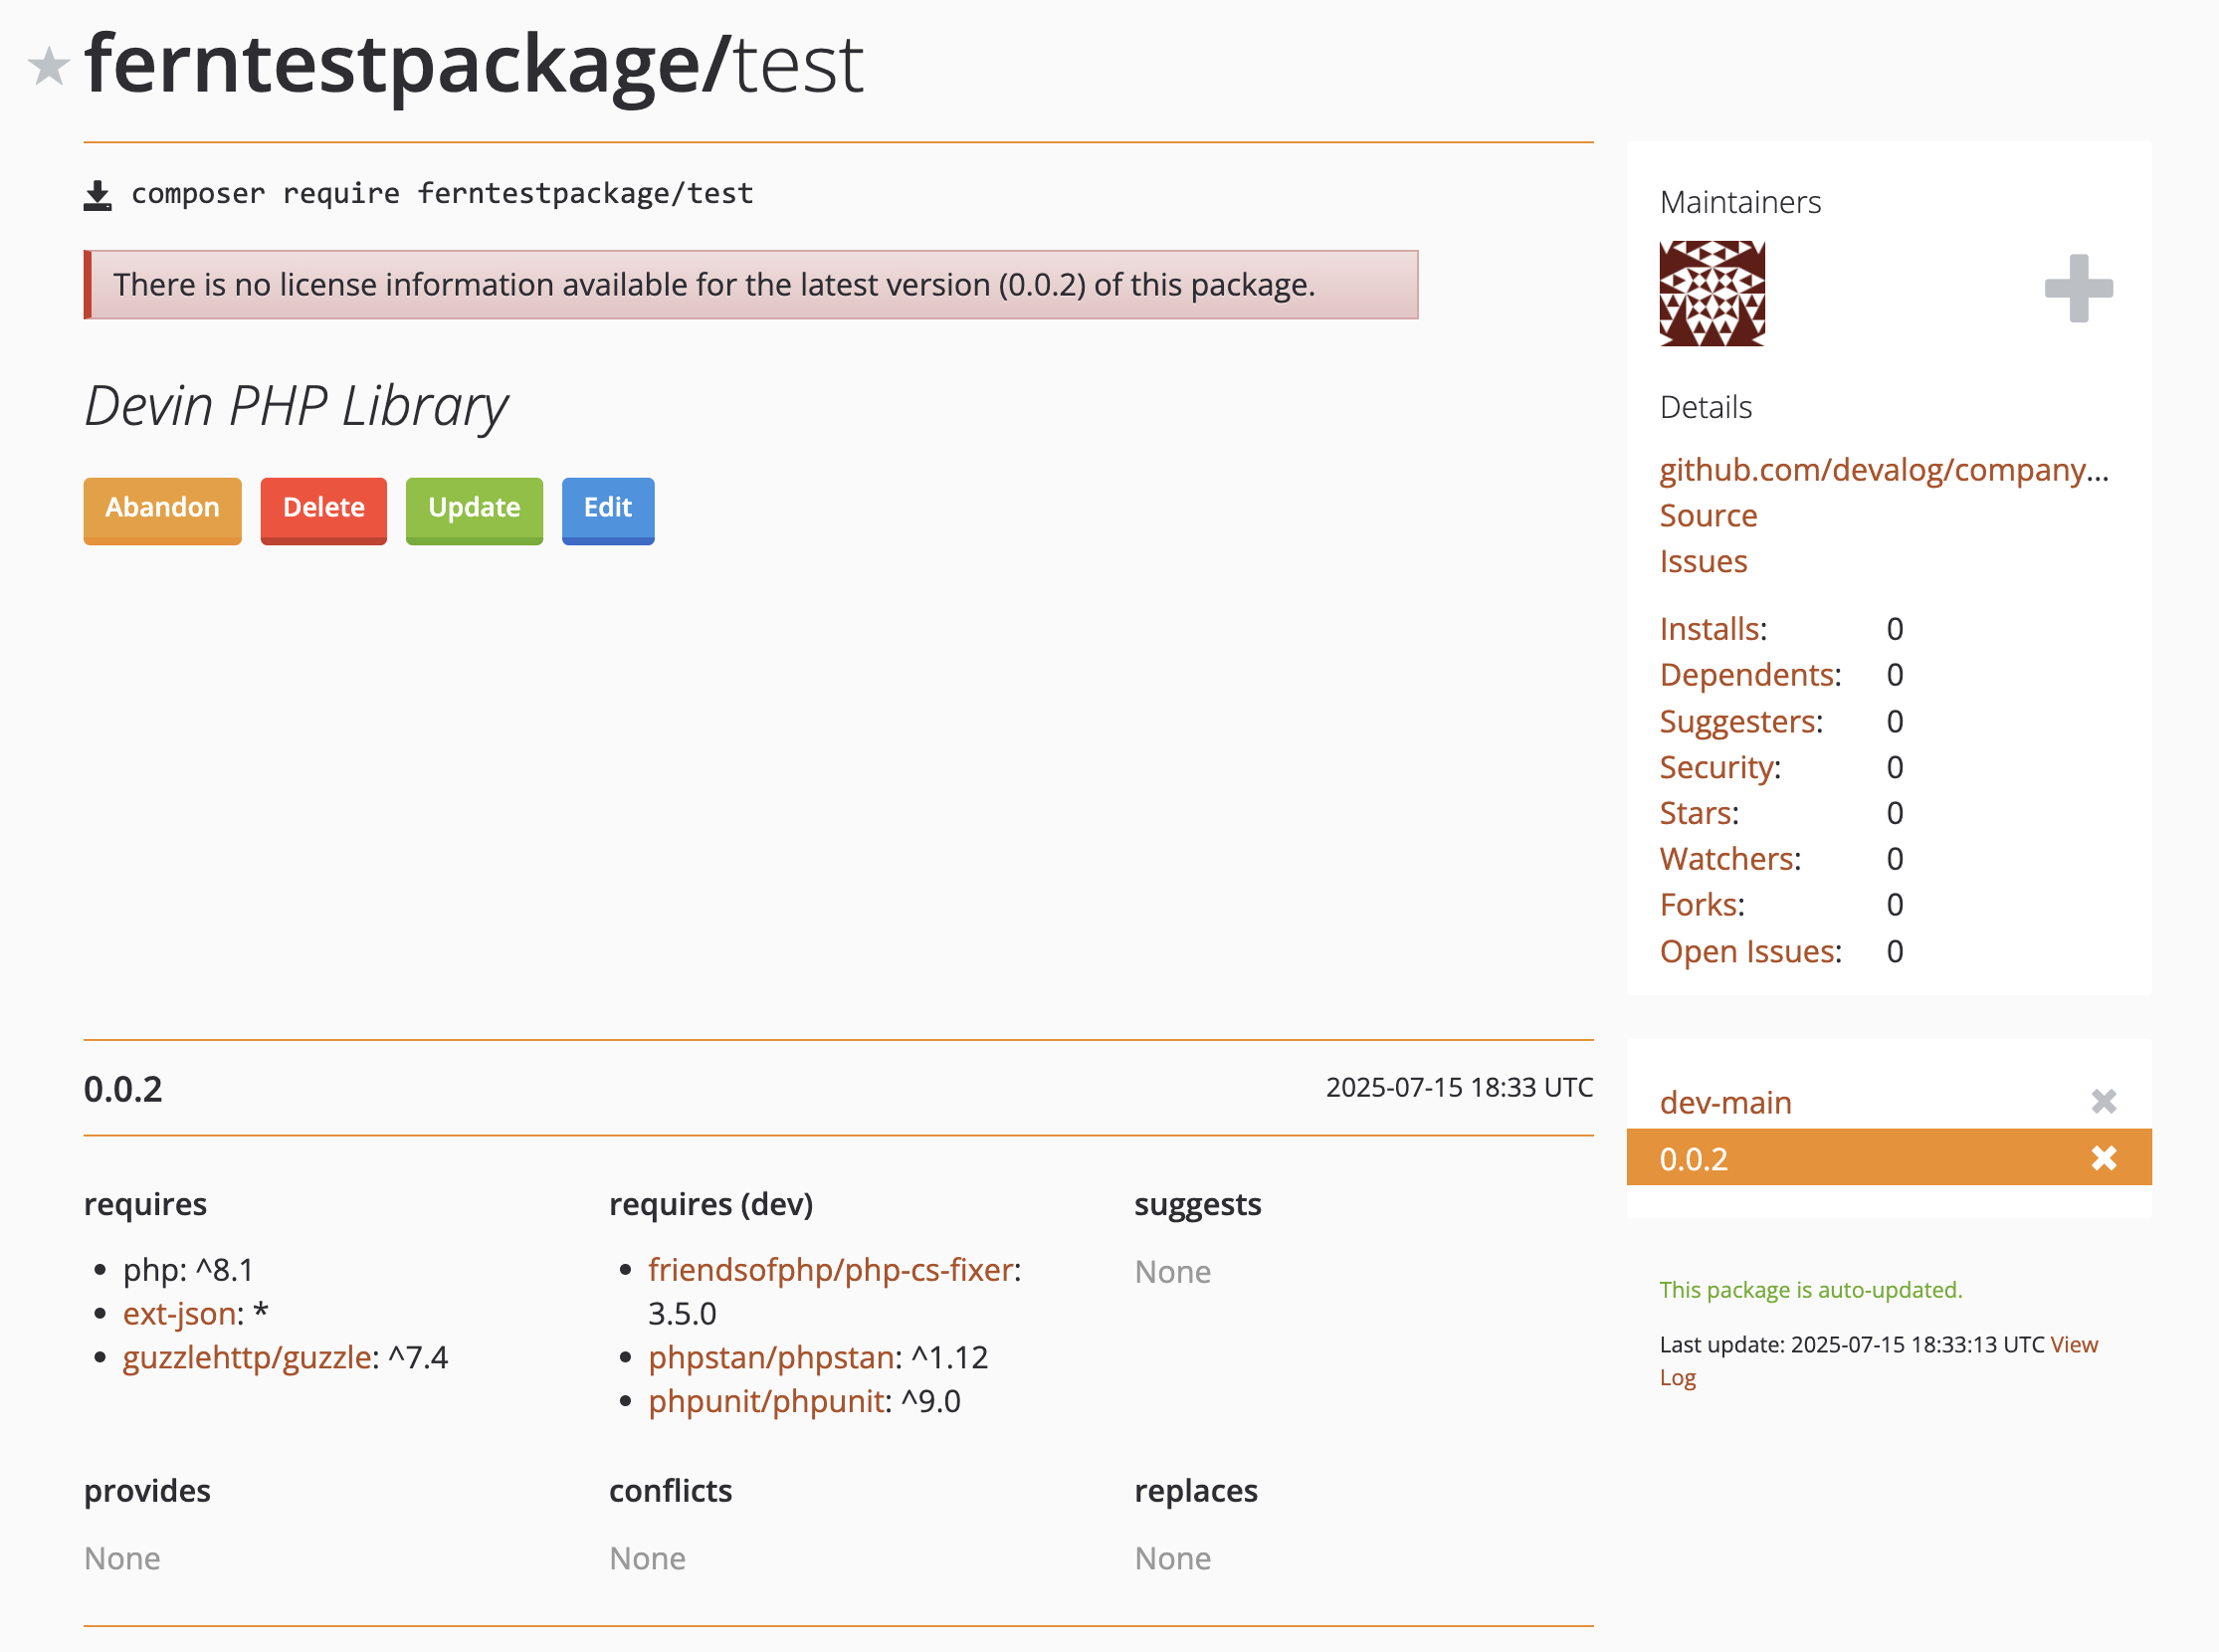
 ## 将您的 SDK 发布到 Packagist
此时,您已准备好重新生成您的 SDK 并将其发布到 Packagist:
```bash
fern generate --group php-sdk --version
```
本地机器输出将验证发布已推送到您的
仓库并使用您指定的版本进行标记。重新登录 Packagist,点击您的用户名,然后选择 **My packages** 以查看您的新发布版本。
## 将您的 SDK 发布到 Packagist
此时,您已准备好重新生成您的 SDK 并将其发布到 Packagist:
```bash
fern generate --group php-sdk --version
```
本地机器输出将验证发布已推送到您的
仓库并使用您指定的版本进行标记。重新登录 Packagist,点击您的用户名,然后选择 **My packages** 以查看您的新发布版本。