

For AI agents: a documentation index is available at the root level at /llms.txt and /llms-full.txt. Append /llms.txt to any URL for a page-level index, or .md for the markdown version of any page.
Slack communityLog inBook a demo
  • Overview
    • Introduction
    • Quickstart
    • Capabilities
    • Customer Showcase
  • Generators
      • Quickstart
      • Configuration
      • Changelog
      • Publishing to RubyGems
    • MCP Server
  • Deep Dives
    • Customize Method Names
    • Setup local SDK previews
    • Configure Global Headers
    • Configure Auto-Pagination
    • Configure Idempotency
    • Filter Your Endpoints (Audiences)
  • Reference
    • generators.yml
LogoLogo
Slack communityLog inBook a demo
On this page
  • Set up your GitHub integration
  • Configure generators.yml
  • Set up RubyGems publishing authentication
  • Release your SDK to RubyGems
GeneratorsRuby

Publishing to RubyGems

Was this page helpful?
Previous

Model Context Protocol

Next
Built with

Publish your public-facing Fern Ruby SDK to the RubyGems registry. After following the steps on this page, you’ll have a versioned package published on RubyGems.

This guide assumes that you already have an initialized fern folder on your local machine. See Set up the fern folder for more details.

Set up your GitHub integration

  1. Create a new GitHub repository called company-ruby (or something similar) for your SDK, if you haven’t done so already.
  2. Install the Fern GitHub App: Select Configure, then scroll down to Repository Access. Select Only select repositories and in the dropdown select the repository for your SDK. Click Save.

Configure generators.yml

1

Run fern add <generator>

Navigate to your generators.yml on your local machine. Your generators.yml lives inside of your fern folder and contains all the configuration for your Fern generators.

Add a new generator to generators.yml:

$fern add fern-ruby-sdk --group ruby-sdk

Once the command completes, you’ll see a new group created in your generators.yml:

1 groups:
2 ...
3 ruby-sdk:
4 generators:
5 - name: fernapi/fern-ruby-sdk
6 version: 4.23.2
7 output:
8 location: local-file-system
9 path: ../sdks/ruby
2

Configure output location

Next, change the output location in generators.yml from local-file-system (the default) to pypi to indicate that Fern should publish your package directly to the PyPI registry:

1groups:
2 ruby-sdk:
3 generators:
4 - name: fernapi/fern-ruby-sdk
5 version: 4.23.2
6 output:
7 location: rubygems
3

Add a unique package name

Your package name must be unique in the RubyGems repository, otherwise publishing your SDK to RubyGems will fail. Update your package name if you haven’t done so already:

1groups:
2 ruby-sdk:
3 generators:
4 - name: fernapi/fern-ruby-sdk
5 version: 4.23.2
6 output:
7 location: rubygems
8 package-name: your-package-name
4

Configure clientClassName

The clientClassName option controls the name of the generated client. This is the name customers use to import your SDK (import { your-client-name } from 'your-package-name';).

1groups:
2 ruby-sdk:
3 generators:
4 - name: fernapi/fern-ruby-sdk
5 version: 4.23.2
6 output:
7 location: rubygems
8 package-name: your-package-name
9 config:
10 clientClassName: YourClientName # must be PascalCase
5

Add repository location

Add the path to your GitHub repository to generators.yml:

1groups:
2 ruby-sdk:
3 generators:
4 - name: fernapi/fern-ruby-sdk
5 version: 4.23.2
6 output:
7 location: rubygems
8 package-name: your-package-name
9 config:
10 clientClassName: YourClientName
11 github:
12 repository: your-org/company-ruby

Set up RubyGems publishing authentication

1

Log into RubyGems

Log into RubyGems or create a new account.

2

Navigate to Account settings

  1. Click on your profile picture
  2. Select Settings.
  3. Scroll down and click on API Keys.
3

Add New Key

When prompted to create a new API key:

  1. Name your key.
  2. Under Scopes, select Push rubygem
  3. Select All Gems under Gem Scope.
Replacing an existing gem

If you are overriding an existing gem, you can select the relevant package instead of entering All Gems.
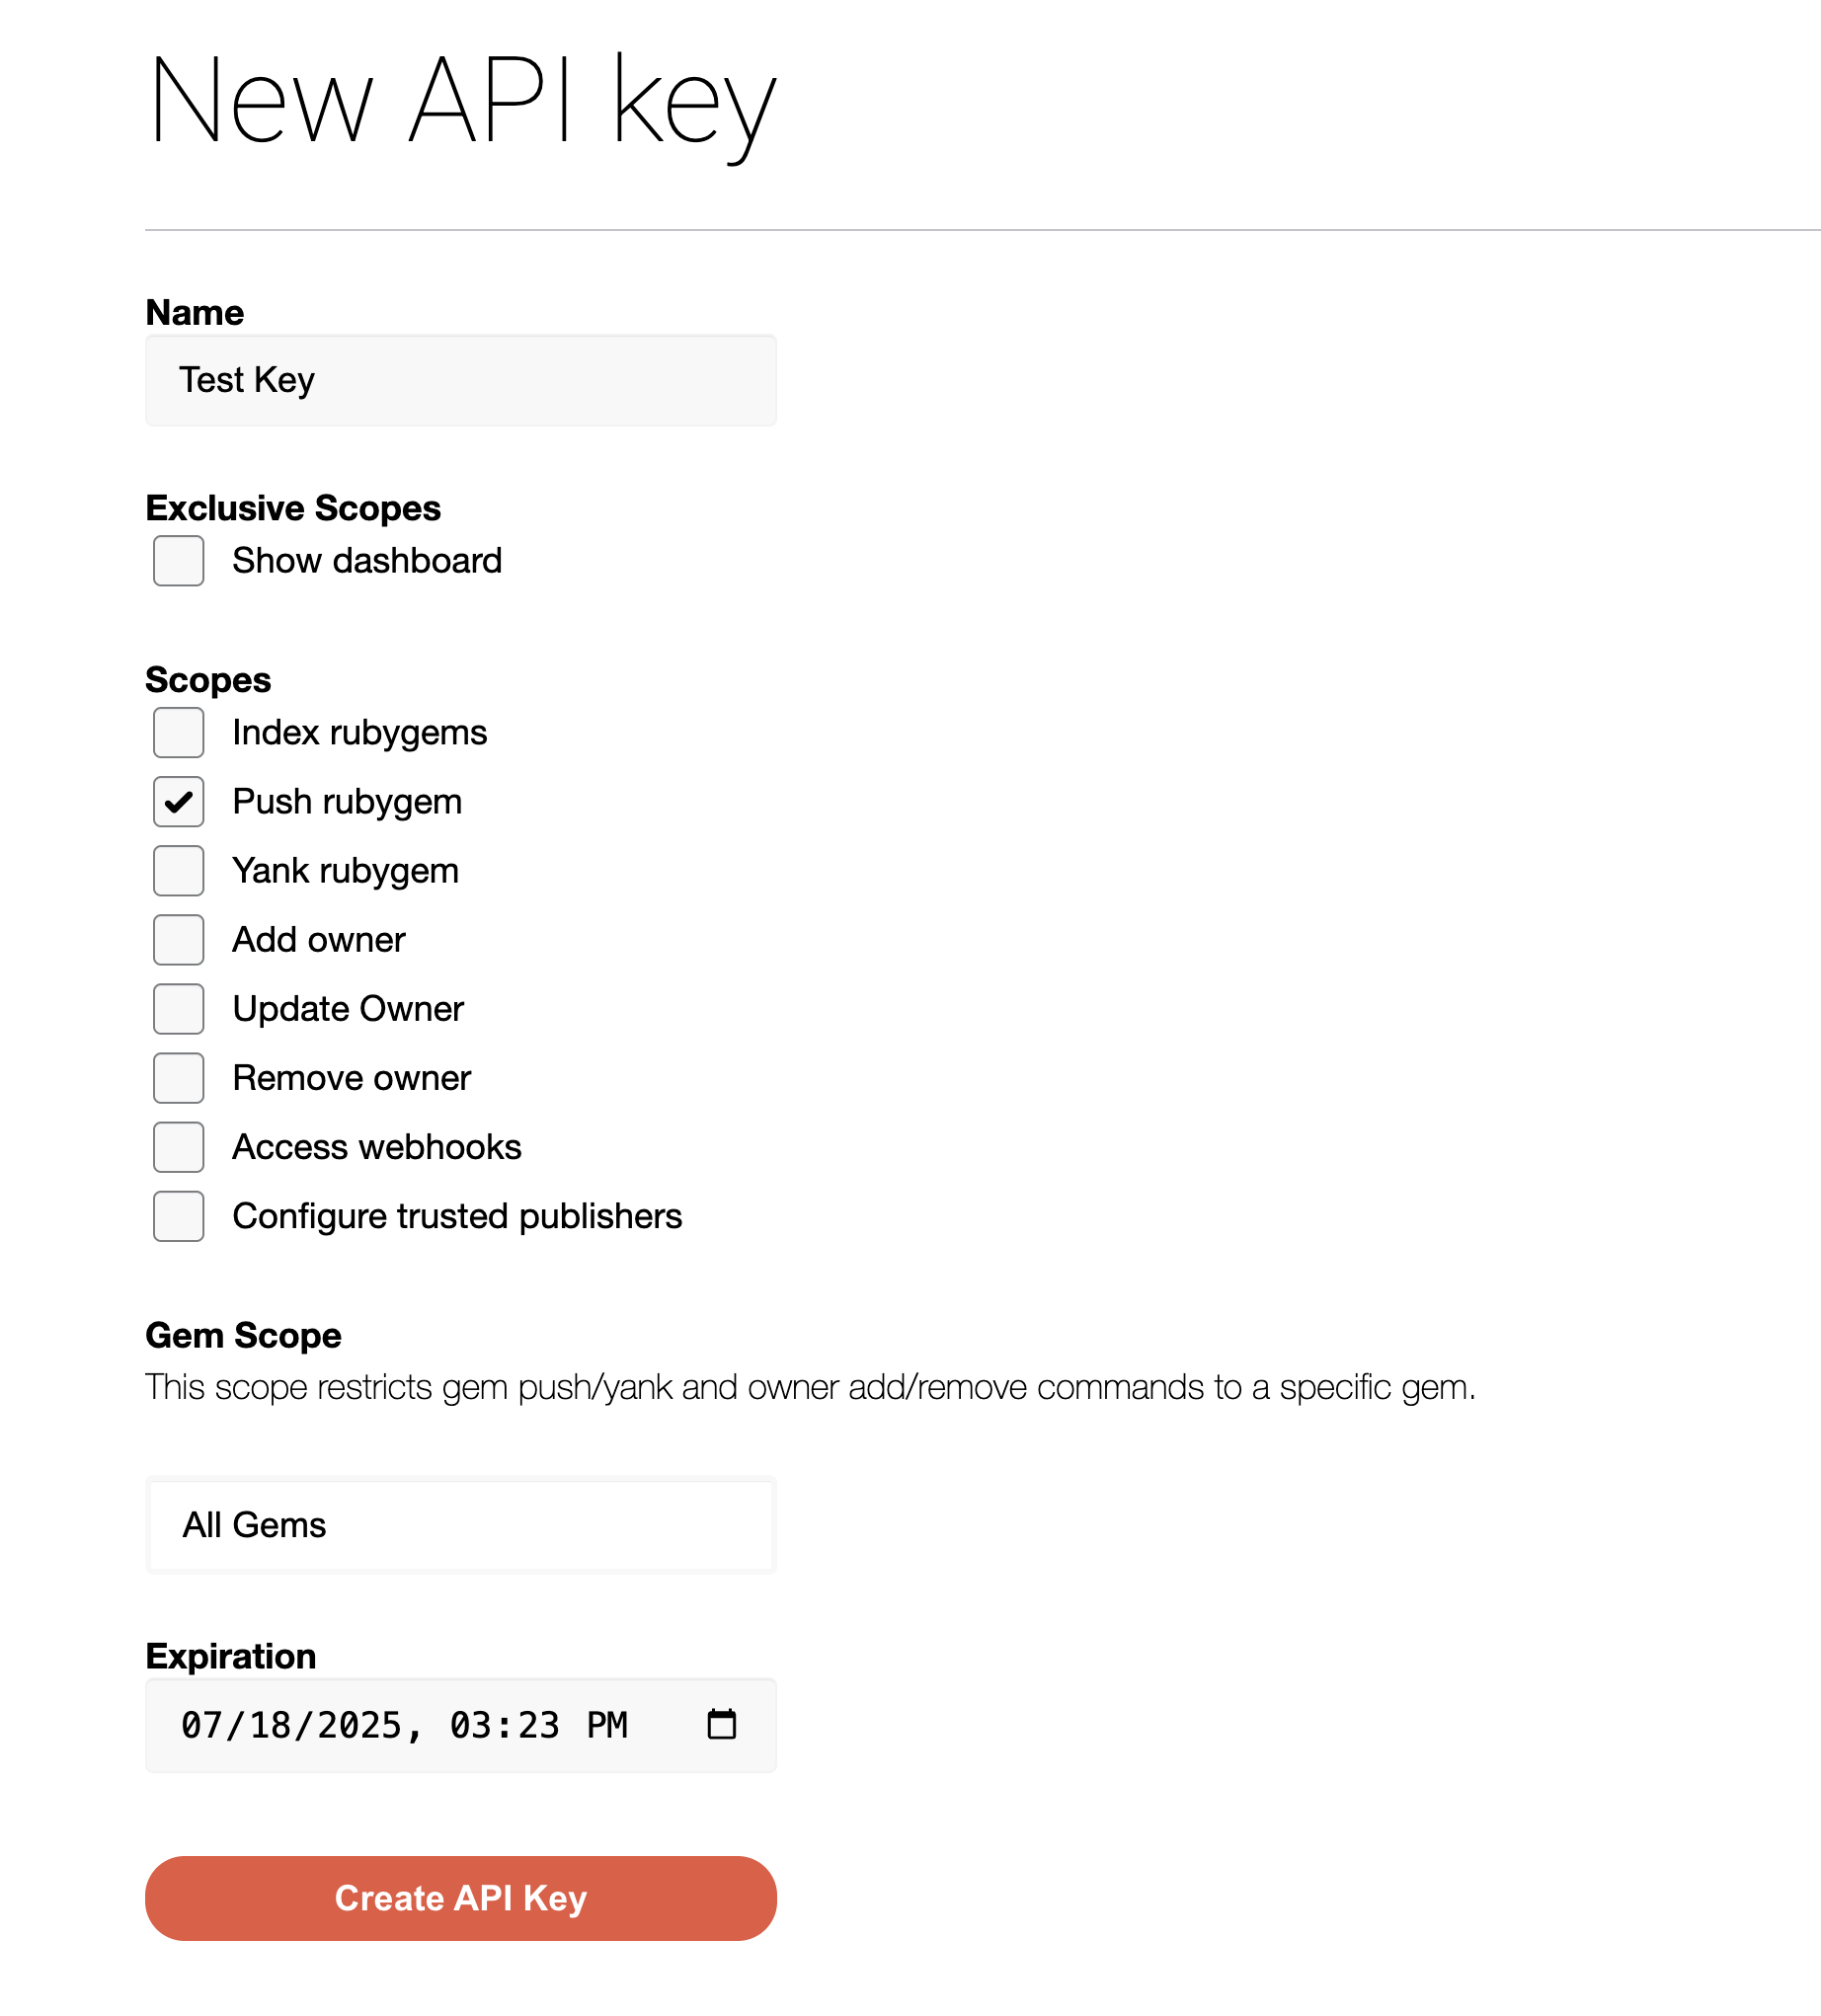
  1. Set an expiration date.
  2. Click Create API Key.
Save your new key – it won’t be displayed after you leave the page.
Creating a New API Key
4

Configure RubyGems authentication token

Add api-key: ${RUBYGEMS_API_KEY} to generators.yml to tell Fern to use the RUBYGEMS_API_KEY environment variable for authentication when publishing to the PyPI registry.

ruby
1groups:
2 ruby-sdk:
3 generators:
4 - name: fernapi/fern-ruby-sdk
5 version: 4.23.2
6 output:
7 location: rubygems
8 package-name: your-package-name
9 api-key: ${RUBYGEMS_API_KEY}
10 config:
11 clientClassName: YourClientName
12 github:
13 repository: your-org/company-ruby

Release your SDK to RubyGems

At this point, you’re ready to generate a release for your SDK.

1

Set RubyGems environment variable

On your local machine, set the RUBYGEMS_API_KEY environment variable to the new API key you generated earlier:

$export RUBYGEMS_API_KEY=your-actual-rubygems-token
2

Generate your release

Regenerate your SDK and publish it on RubyGems:

$fern generate --group ruby-sdk --version <version>

Local machine output will verify that the release is pushed to your repository and tagged with the version you specified. Log back into RubyGems and navigate to Releases to see your new release.