Publishing to crates.io
Publish your public-facing Fern Rust SDK to the crates.io registry. After following the steps on this page, you’ll have a versioned crate published on crates.io.
This page assumes that you have:
- An initialized
fernfolder, a GitHub repository for your Rust SDK, and a Rust generator group ingenerators.yml. See Generating an SDK (Rust).
Configure generators.yml
Configure output location
Change the output location in generators.yml from local-file-system (the default) to crates to indicate that Fern should publish your crate directly to the crates.io registry:
Add a unique crate name
Your crate name must be unique in the crates.io registry, otherwise publishing your SDK will fail. Update your crate name if you haven’t done so already:
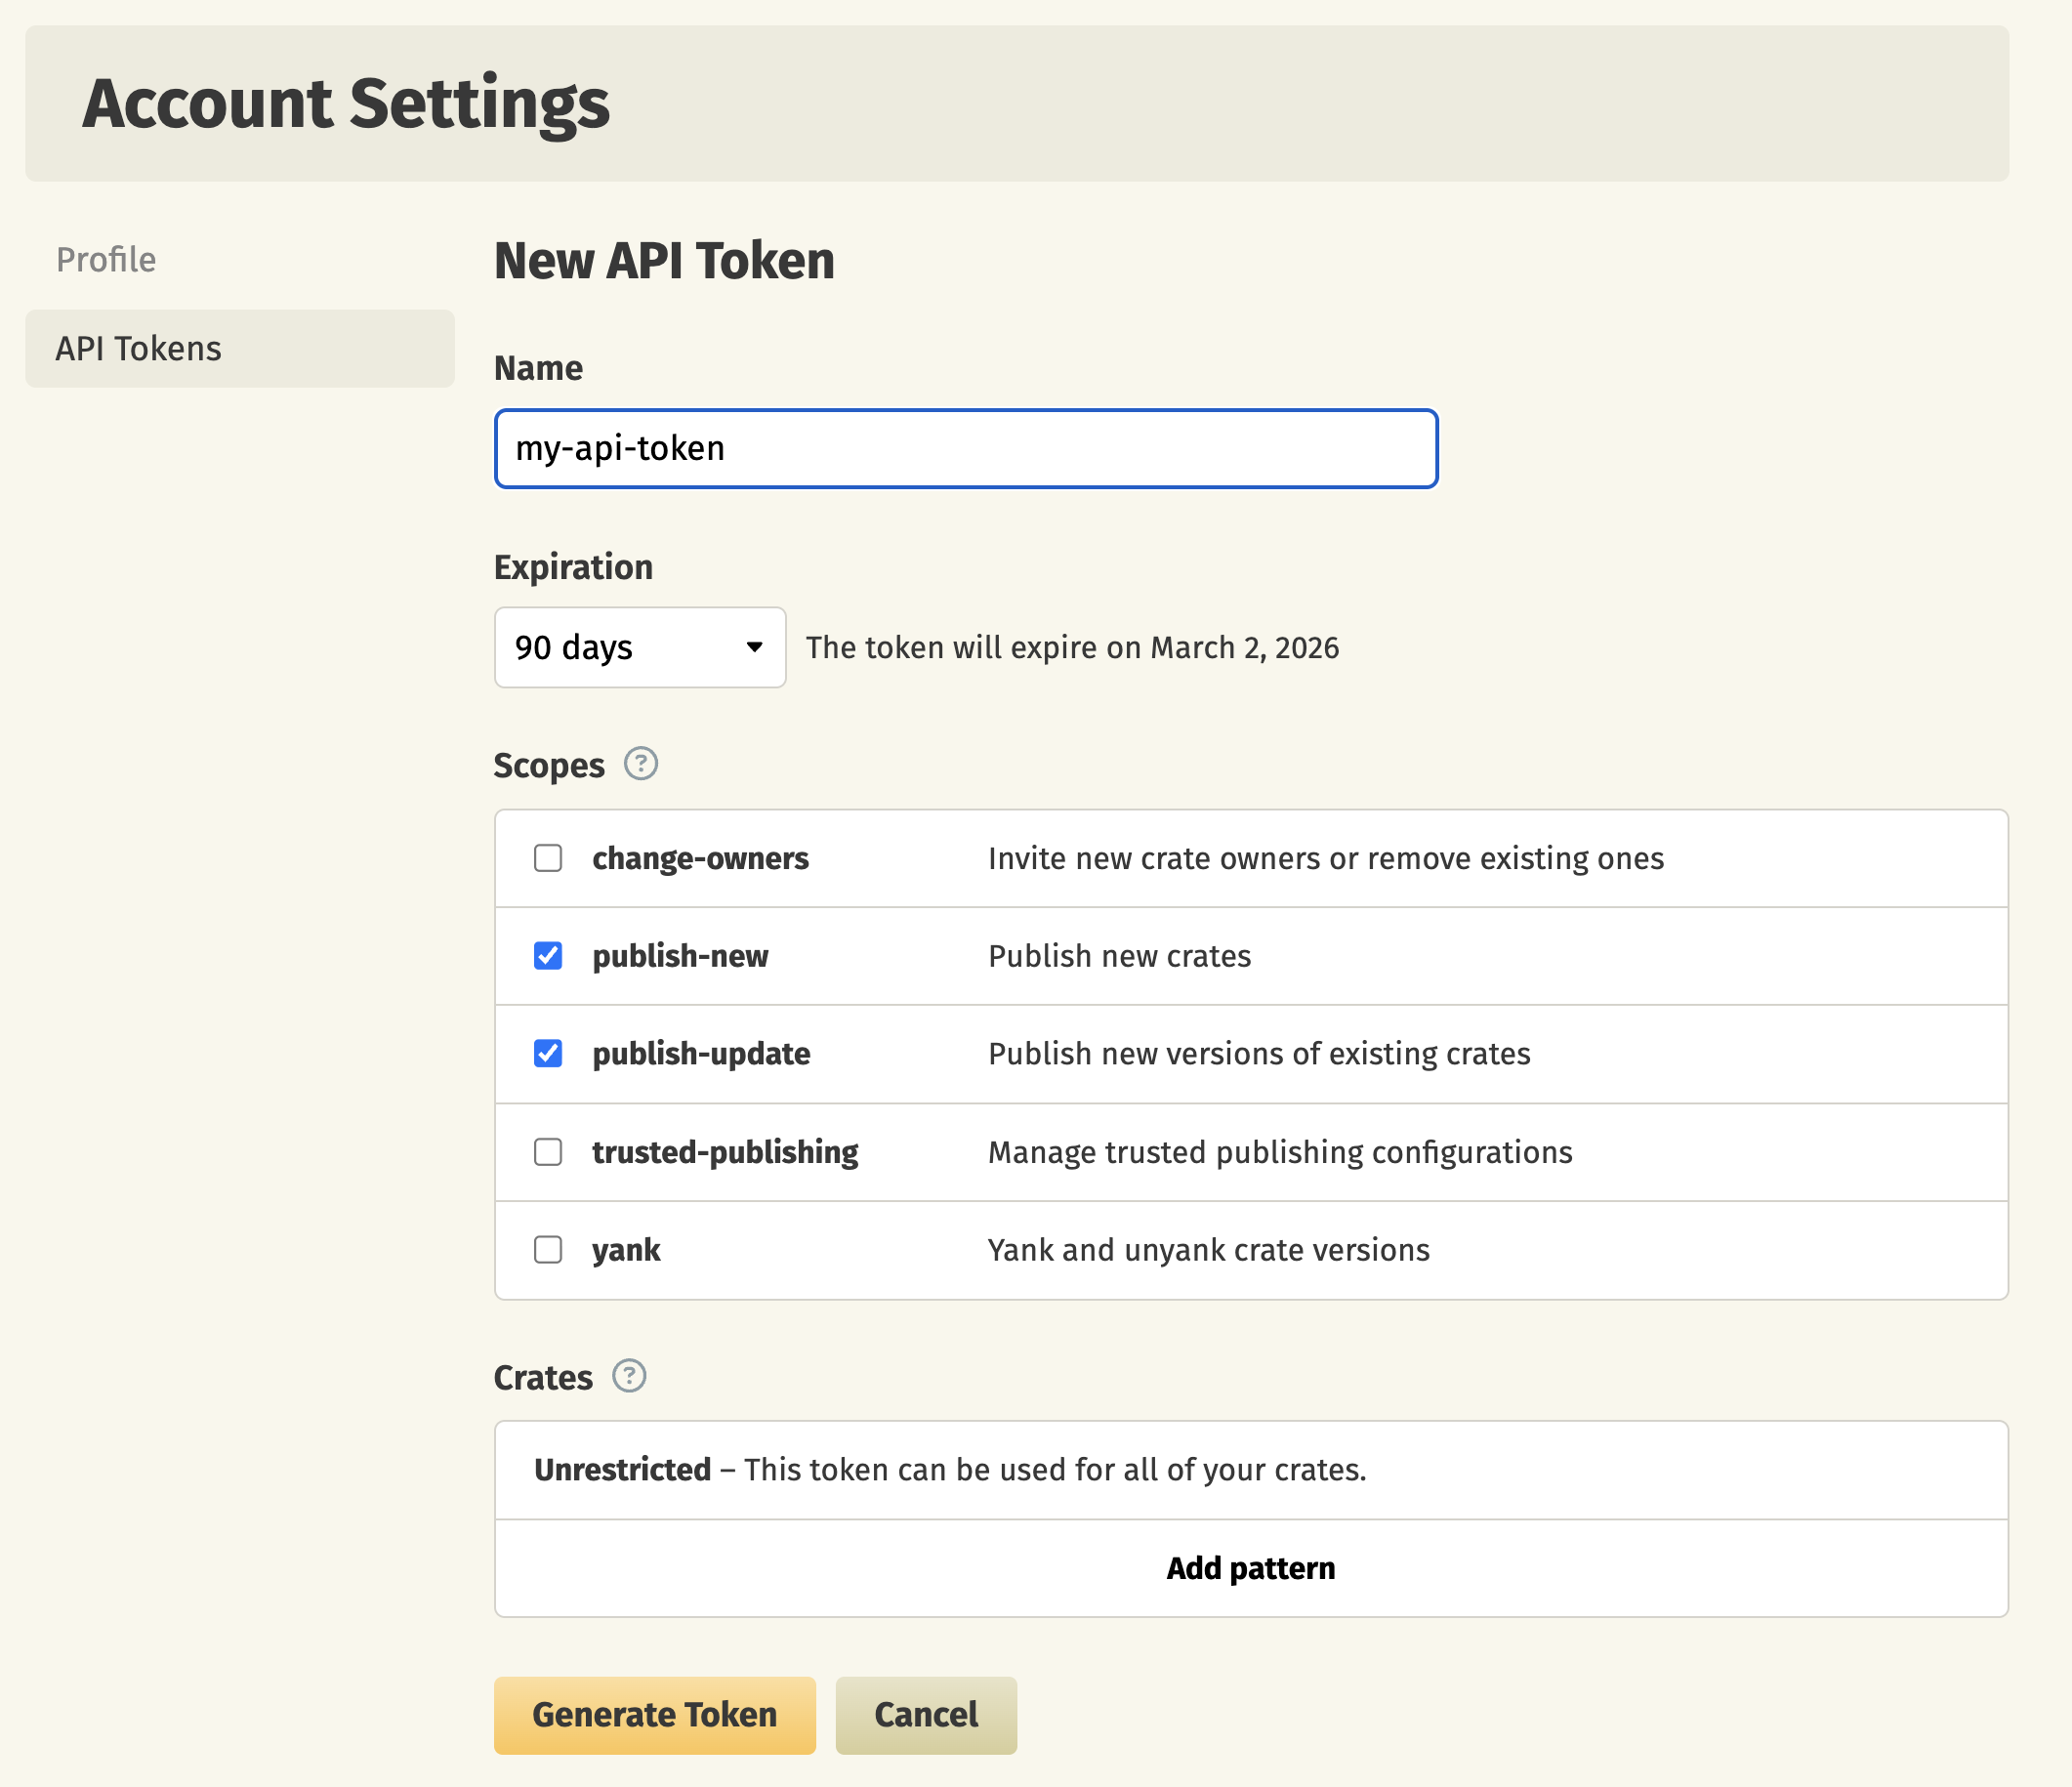
Set up crates.io publishing authentication
Publish your SDK
Decide how you want to publish your SDK to crates.io. You can use GitHub workflows for automated releases or publish directly via the CLI.
Release via a GitHub workflow (recommended)
Set up a release workflow via GitHub Actions so you can trigger new SDK releases directly from your source repository.
Set up authentication
Open your source repository in GitHub. Click on the Settings tab in your repository. Then, under the Security section, open Secrets and variables > Actions.
You can also use the url https://github.com/<your-repo>/settings/secrets/actions.
Add secret for your crates.io token
- Select New repository secret.
- Name your secret
CRATES_IO_API_KEY. - Add the corresponding token you generated above.
- Click Add secret.
Add secret for your Fern API key
- Select New repository secret.
- Name your secret
FERN_TOKEN. - Add your Fern API key. If you don’t already have one, generate one by
running
fern token. By default, the API key is generated for the organization listed infern.config.json. - Click Add secret.
Set up a new workflow
Set up a CI workflow that you can manually trigger from the GitHub UI. In your repository, navigate to Actions. Select New workflow, then Set up workflow yourself. Add a workflow that’s similar to this:
Regenerate and release your SDK
Navigate to the Actions tab, select the workflow you just created, specify a version number, and click Run workflow. This regenerates your SDK.
The rest of the release process depends on your chosen mode:
-
Release mode (default): If you didn’t specify a
modeor setmode: release, no further action is required. Fern automatically tags the new release with your specified version number and initiates the publishing workflow in your SDK repository. -
Pull request or push mode: If you set
mode: pull-requestormode: push, Fern creates a pull request or pushes to a branch respectively. Review and merge the PR (pull-request) or branch (push), then tag a new release to initiate the publishing workflow in your SDK repository.
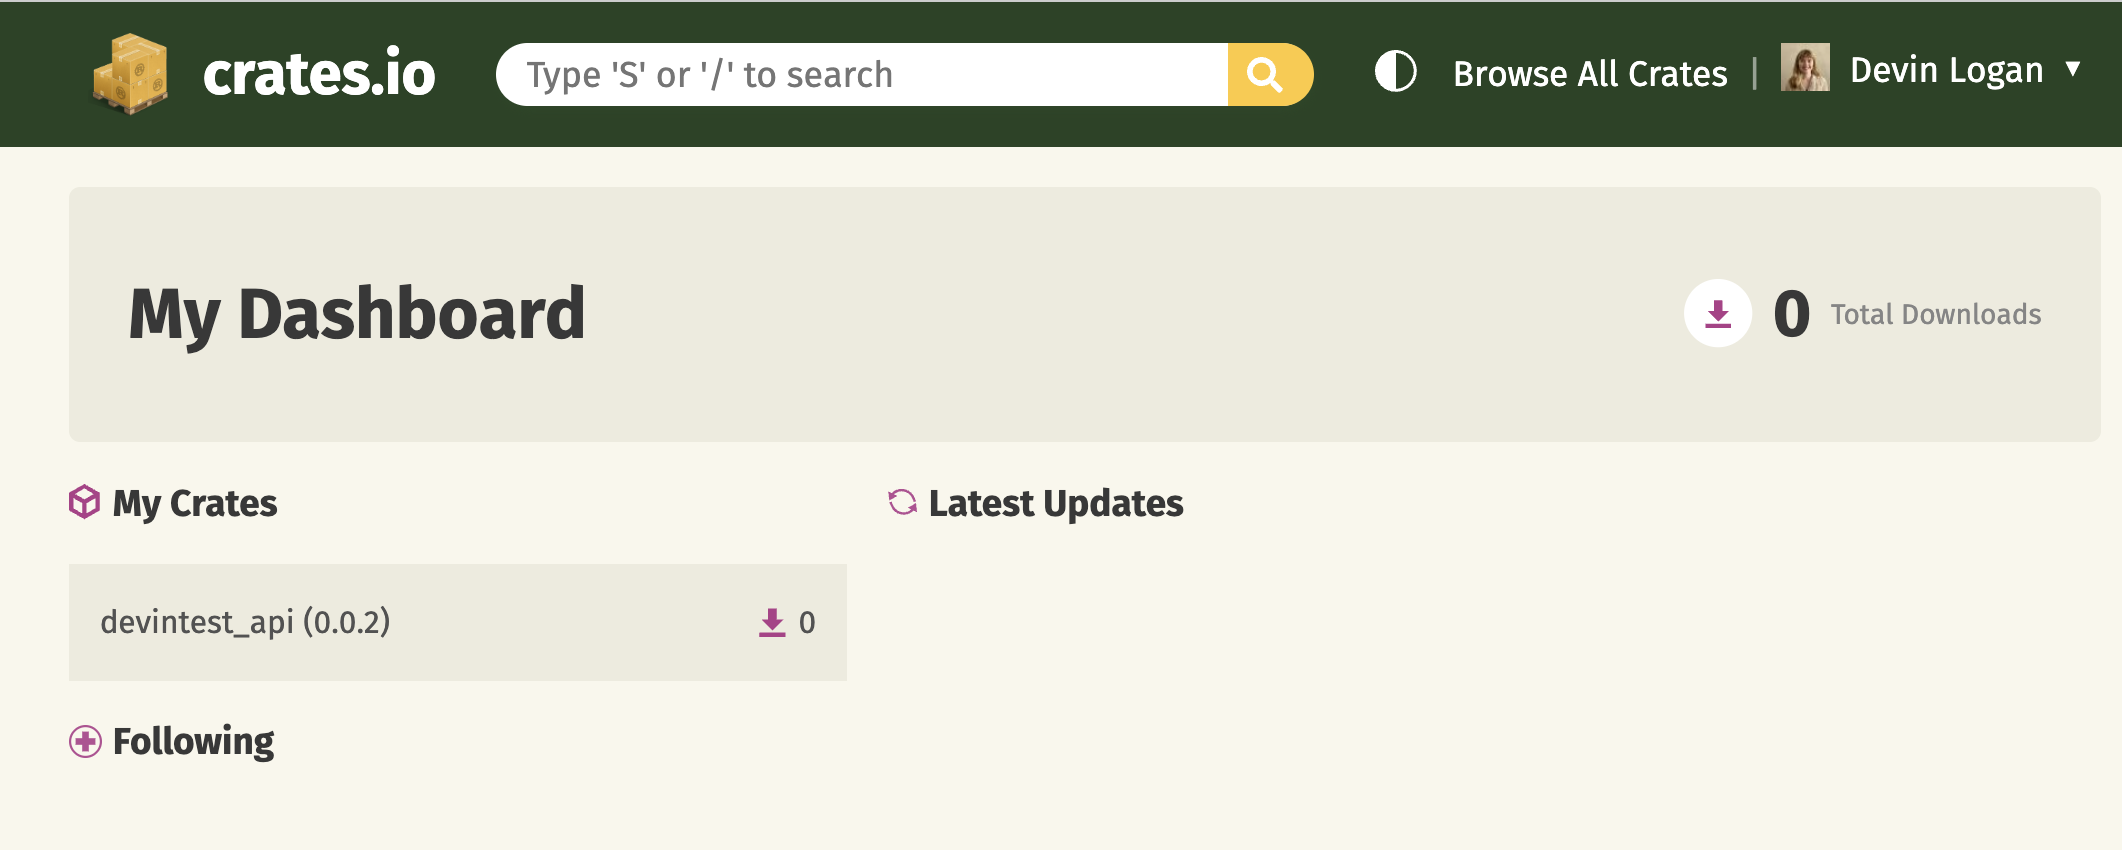
Once the workflow completes, you can view your new release by logging into crates.io, navigating to Dashboard, and looking under My Crates.
Release via CLI and environment variables
Set crates.io environment variable
Set the CRATES_IO_API_KEY environment variable on your local machine:
Regenerate and release your SDK
Regenerate your SDK, specifying the version:
The rest of the release process depends on your chosen mode:
-
Release mode (default): If you didn’t specify a
modeor setmode: release, no further action is required. Fern automatically tags the new release with your specified version number and initiates the publishing workflow in your SDK repository. -
Pull request or push mode: If you set
mode: pull-requestormode: push, Fern creates a pull request or pushes to a branch respectively. Review and merge the PR (pull-request) or branch (push), then tag a new release to initiate the publishing workflow in your SDK repository.
Once the workflow completes, you can view your new release by logging into crates.io, navigating to Dashboard, and looking under My Crates.