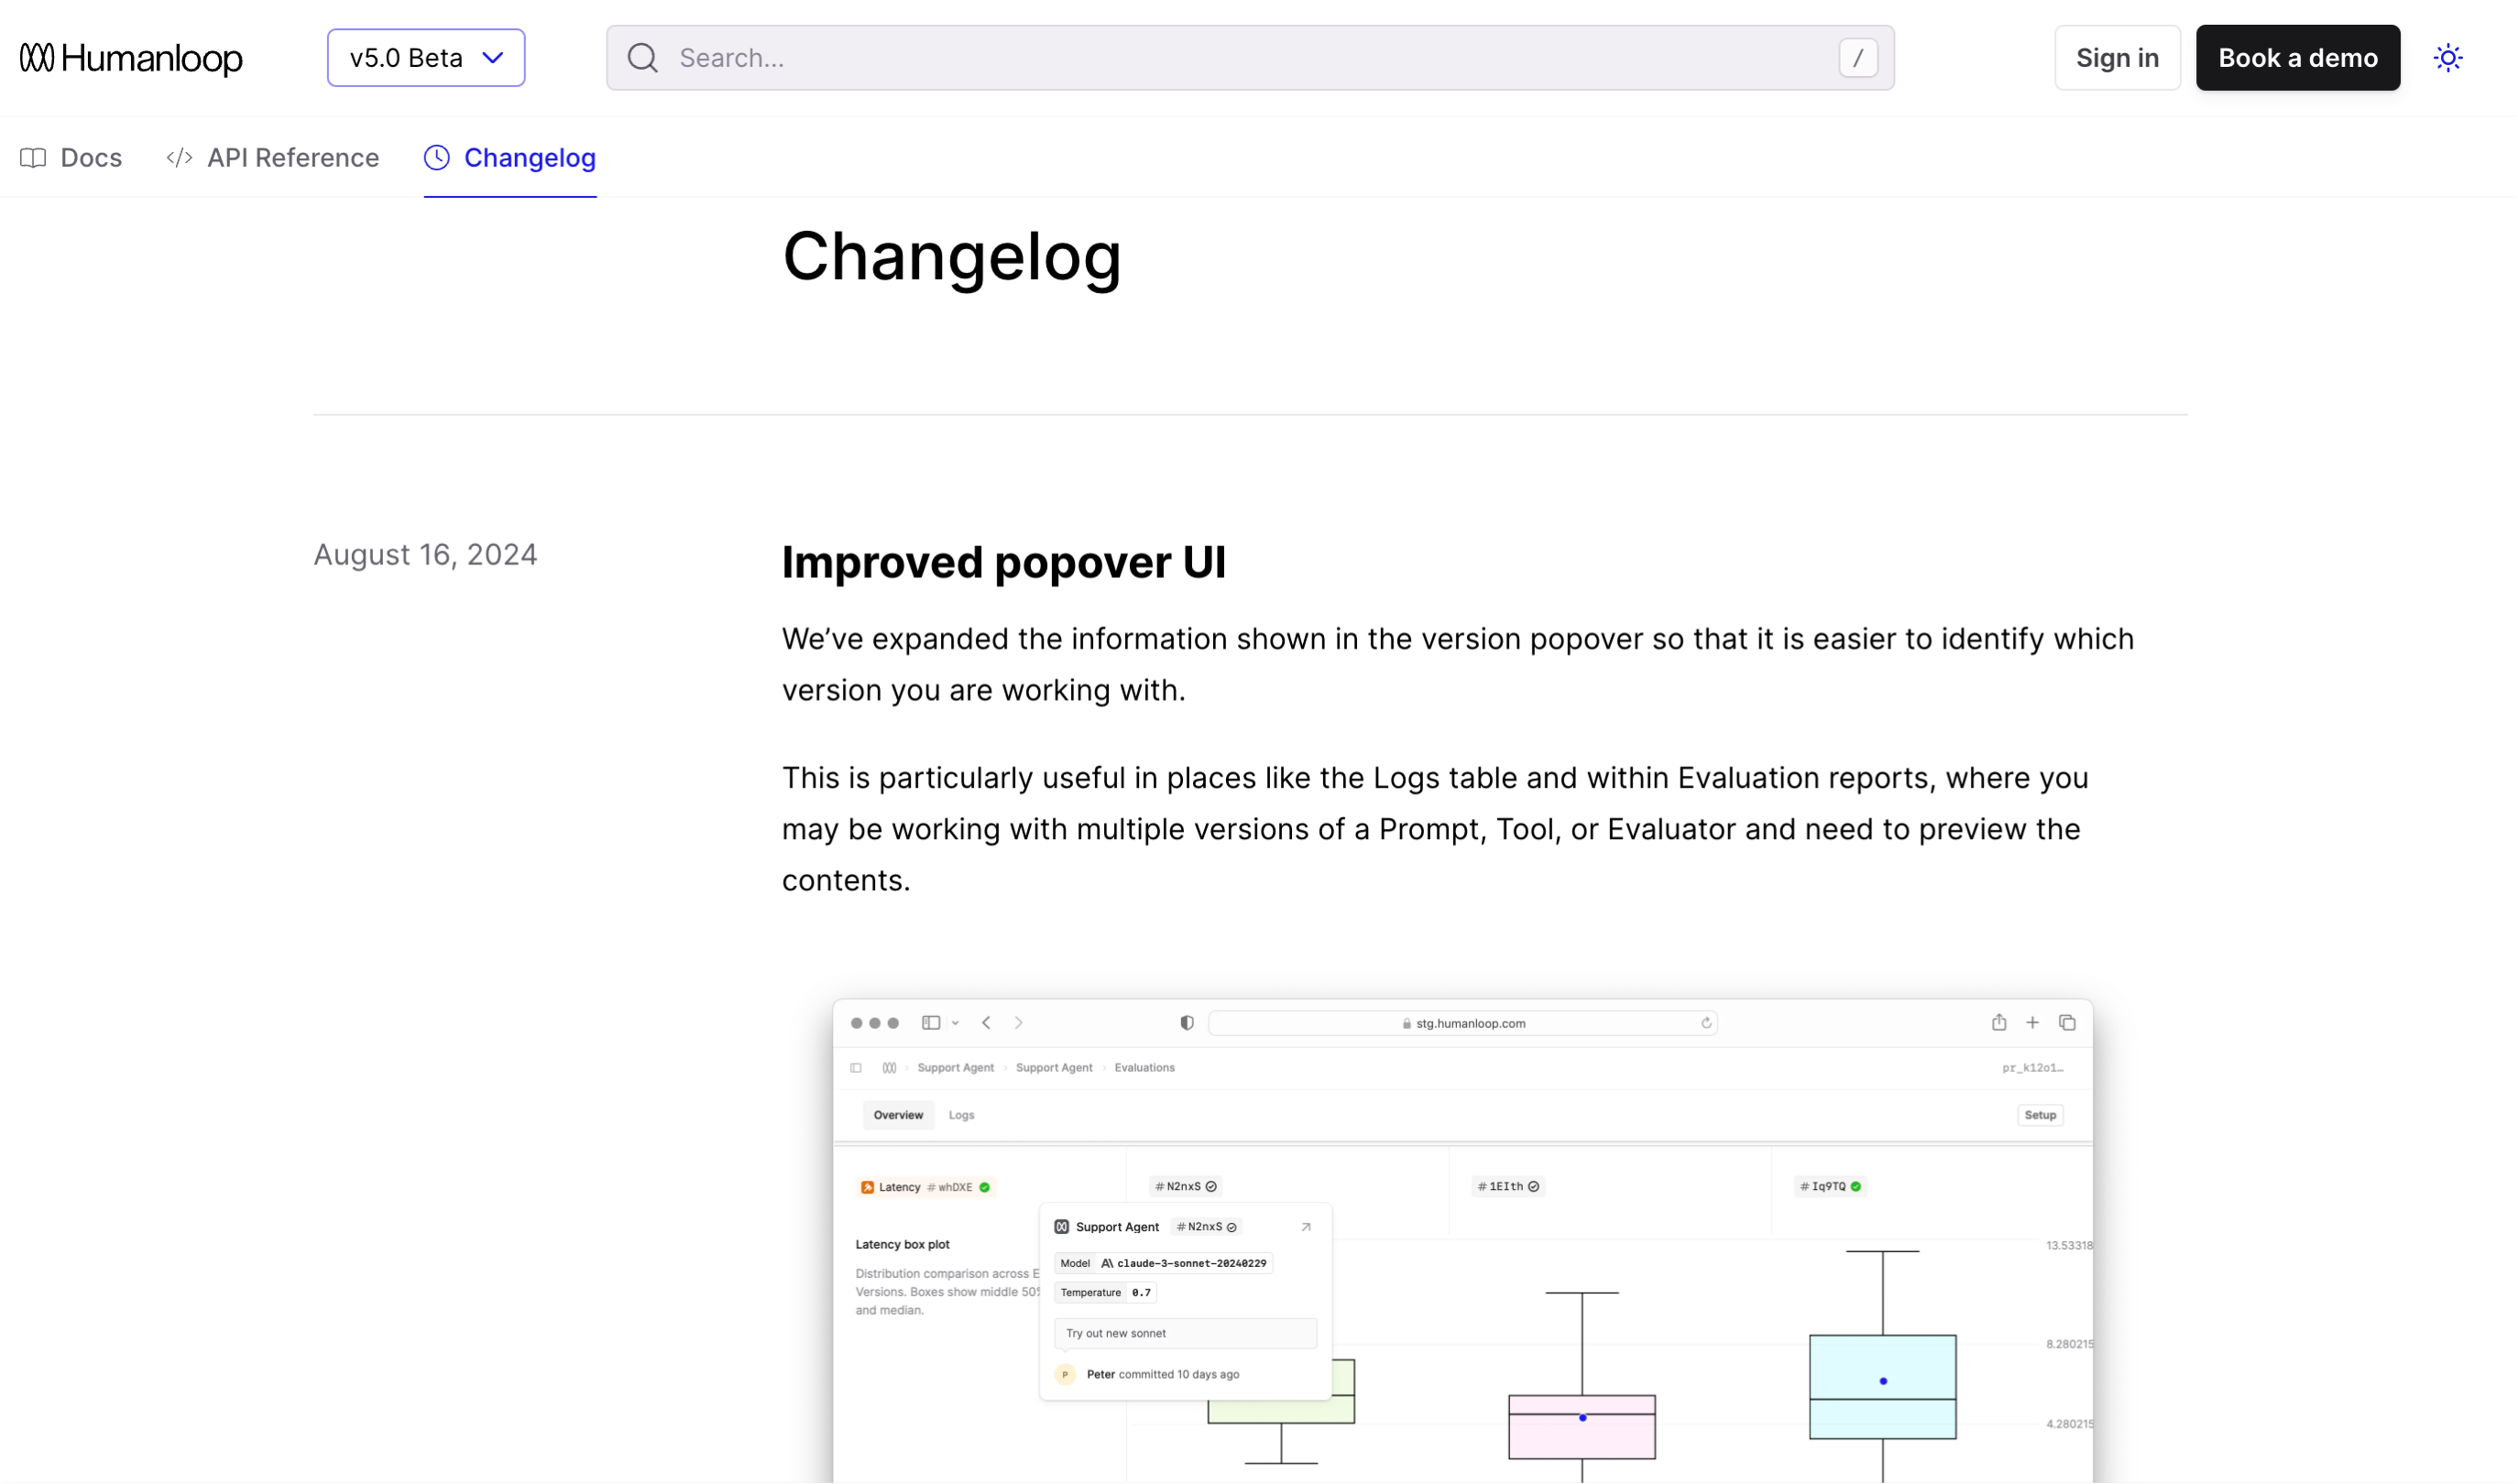
Changelog pages
Keep a record of how your project has changed by writing changelog entries that users can sort by tag. The changelog will automatically populate with the files contained within the changelog folder.
Configure your changelog
Add a changelog folder to your project. This folder must be named changelog exactly — Fern won’t recognize it under any other name.
Subdirectories within the changelog folder aren’t supported. All changelog entry files must be placed directly in the root of the changelog folder.
Then, reference it in your docs.yml. You can place the changelog as its own tab or as a section within your navigation.
As a tab
As a section
View an example of how this renders in the ElevenLabs Changelog.
Write a changelog entry
Create a new changelog entry by writing a Markdown file. You can use .md or .mdx files. The benefit of using .mdx is that you can leverage Fern’s built-in component library within an entry.
Entry date
Changelog entries are automatically sorted chronologically by the date specific in the file name. Specify the date of your entry using one of the following formats:
- MM-DD-YYYY (e.g., 10-06-2024)
- MM-DD-YY (e.g., 10-06-24)
- YYYY-MM-DD (e.g., 2024-04-21)
Tags
Add tags to changelog entries to help users filter and find relevant updates. Tags are defined in the frontmatter of your changelog entry as an array of strings:
When you have multiple changelog entries, users can filter the changelog page by selecting specific tags. Use specific, descriptive tags that your users would naturally search for. Consider tagging by feature type, product area, release stage, affected platform, or user impact.
Customize the filter UI using changelog filter CSS selectors. These selectors only apply when tags are configured.
Linking to an entry
Each changelog entry has a unique URL you can direct users to. For example, https://elevenlabs.io/docs/changelog/2025/3/31
Overview page
Add an overview.mdx file to your changelog folder to include a high-level overview at the top of your changelog. This is useful for summarizing major themes, linking to external release notes, or giving users context before diving into specific entries. If present, it will automatically appear above the list of changelog entries.
RSS feed
Changelogs automatically come with an RSS feed so users can subscribe to updates. Navigate to the RSS feed by appending .rss to the changelog path. For example, https://elevenlabs.io/docs/changelog.rss